| Create a folder entitled Computer graphics-I and place it in your u drive. | |
| Then create folders which are placed in the Computer Graphics I folder. The folders are: PAINT, WORD, PHOTOSHOP, sKETCHUP, and Photo Story. (Other files may be added.) | |
| When you name your works, please save the work under the name assigned plus insert your initials after the name. Example: paint dd. (This will allow me to create a master CD of all your work. If there are duplicate initials, use your first name and last initial.) | |
| IMPORTANT--When you save your work, the paint program will save automatically as a BIT-Map--an enormous use of space. Instead, when you save, pull down the menu and you will have a list of possible means of saving your work. Always save as a JPEG!!!!!!!!!!!!! (With the exception of the house project which will become seriously pixelated in jpeg. Save the house as a bitmap.. | |
| You will be working with the Paint program. Start>all programs>accessories>paint | |
| \we will discuss the work space and work from there. | |
| Assignment 1--Start by opening the program and create five works of art using the paint program. Since these are experiments, call them paintx 1, paintx 2, paintx 3, paintx 4, paintx 5. (These can be the experimental use of as many of the available tools as possible. Have fun with this.) The purpose of this assignment is to familiarize yourself with the various tools available to the artist using paint. | |
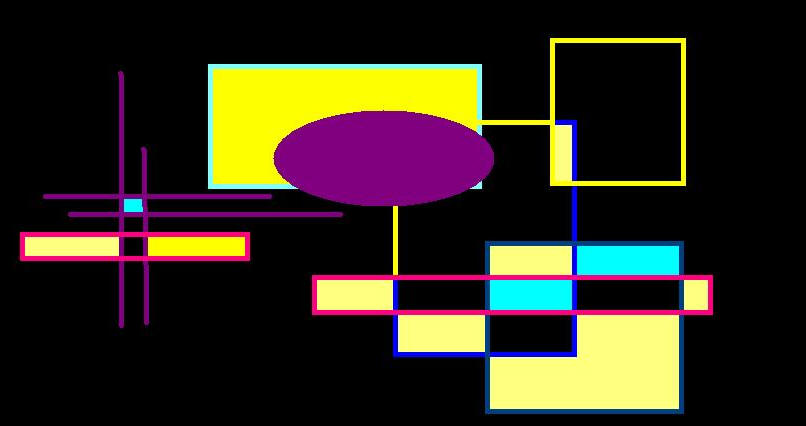
| Assignment 2--Create a picture using the tools to create a simple composition on a black background. Call this shape1 on black. |
|
You may do more experiments using the shape tools--Just number them shape2, shape 3, shape 4, etc.up to five. Try a variety of background colors also. |
This is an unnumbered assignment--Take a design of your creation (Create a picture) and call it paint positive. Then, go to image and click invert colors. Call this Invert Colors
|
| |
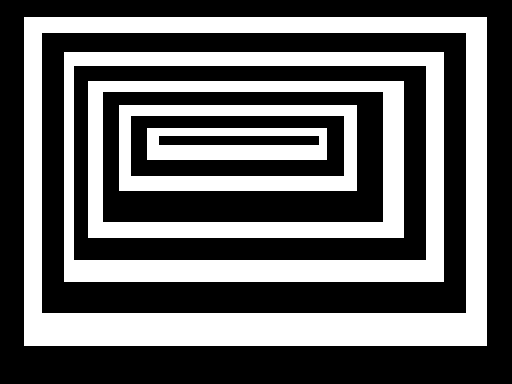
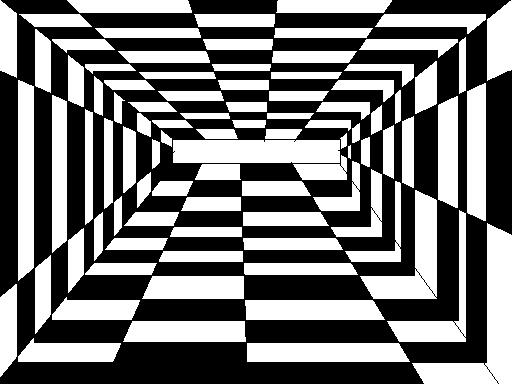
| Assignment 3--Create an optical art design using the picture as a model. Call this work OP-Art | |
| To do this, create a design using shapes and lines which result in small boxes. Use the fill tools to make a two color design with every other space being alternated with the other color. Optical art is a type of art which creates designs which seem to cause reactions with our optic nerves. For instance, the design may appear to move on its own. |
| Assignment 5----Create a spray paint landscape. You may use any of the available tools but I would also like you to work with the spray can. Call it landscape. This would include such things as land, trees, flowers, water, animals, buildings, etc. |
| Assignment 6--Create this artistic version of your name. Make a composition using your name as the main aspect of the work. Please note the example below. Call your creation NAME | ||||||||||||||||||||||||||||||||||||||||||||||||||||||||||||||||||||||||||||||||||||||||||||||||||
 | ||||||||||||||||||||||||||||||||||||||||||||||||||||||||||||||||||||||||||||||||||||||||||||||||||
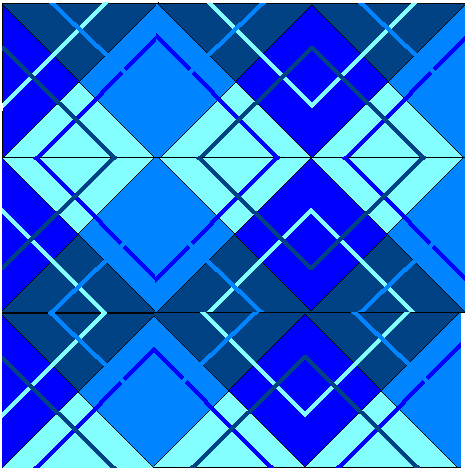
| Assignment 7--Create a quilt design. Start by creating one square of the quilt and then continue to turn and repeat the shapes to create a quilt design. The design shown below, started with one square divided into quarters and shaded with varying degrees of blue. The lines are those same shades of blue. That single square was copied nine times (don't allow your shapes to overlap.) The shapes were then turned using the image menu and followed by the flip/rotate tool. Select the separate squares and slide them into position beside one another. Call your work QUILT | ||||||||||||||||||||||||||||||||||||||||||||||||||||||||||||||||||||||||||||||||||||||||||||||||||
 | ||||||||||||||||||||||||||||||||||||||||||||||||||||||||||||||||||||||||||||||||||||||||||||||||||
| Assignment 8--MC Escher put many years into trying to find a
mathematical way of creating the tessellation. Go to Google Images and look
for the works of M.C. Escher. Artists are able to create them with very
little effort. Go to the following website to create a simple
tessellation: Add
detail to create a picture that uses your tessellations in a creative way.
Add a background.
Tesselation | ||||||||||||||||||||||||||||||||||||||||||||||||||||||||||||||||||||||||||||||||||||||||||||||||||
| Assignment 9 Calligraphy is a type of decorative lettering created by holding a pen with a specific point at a 45 degree angle. The same sort of thing can be done using the tools in the paint program. Create a picture using the calligraphy pens. Save the work as calligraphy. | ||||||||||||||||||||||||||||||||||||||||||||||||||||||||||||||||||||||||||||||||||||||||||||||||||
| Assignment 10 Create a greeting card using the paint program. This should be something usable for a holiday. Those I deem to be printable will be printed on cardstock in color. Call it greeting card. | ||||||||||||||||||||||||||||||||||||||||||||||||||||||||||||||||||||||||||||||||||||||||||||||||||
| Assignment 11--Create a poster that illustrates you. Go into webpages and find photos which may illustrate you. You may add drawings of your choice. You should also use the text tool to create your name. Be careful--if you insert an item, after you have deselected it, the background will come along with the picture if you try to move the picture. Save this as collage of me. | ||||||||||||||||||||||||||||||||||||||||||||||||||||||||||||||||||||||||||||||||||||||||||||||||||
| New project | ||||||||||||||||||||||||||||||||||||||||||||||||||||||||||||||||||||||||||||||||||||||||||||||||||
| ||||||||||||||||||||||||||||||||||||||||||||||||||||||||||||||||||||||||||||||||||||||||||||||||||

| Assignment 12 Using paint shop, create a picture of a house in perspective. Call this perspectivehouse This project will be done together as a class. The completion work will be done by each individual student. |